The Ultimate Guide to Reverb Parameters (Stop Using Random Presets)


There is one thing that separates an amateur mix from a professional mix: the management of three-dimensionality.
And 90% of three-dimensionality is created by mastering the reverb.
Yet, I constantly see producers open a plugin, scroll through dozens of presets called “Big Vocal” or “Snare Plate,” turn up the send fader, and hope it works.
The result is often a muddy, muddy, and lackluster mix. Reverb isn't a magic effect that makes things sound "prettier." It's an engineering tool to simulate a physical space. To do it well, you need to understand exactly what the knobs in front of you do.
There is a 100% free plugin that is a real masterpiece for learning and sculpting space: OrilRiver .
Essential pro-tip before starting: as soon as you download and open OrilRiver, go to the settings and immediately set Skin 2 (or Skin 3) . The default interface is a bit confusing, but Skin 2 visually divides the Early Reflections, Coda and EQ blocks in a crystal-clear way, making the plugin logical and extremely powerful.
Get ready to stop using presets at random. Here's how to build an acoustic space parameter by parameter.
1. Early Reflections and Pre-Delay: Size and Distance
When you clap your hands in a room, the sound reaches your ear in three stages: the direct sound, the very first bounces off the nearest walls, and, finally, the chaotic tangle of continuous bounces (the coda).

Pre-Delay: This is the time (expressed in milliseconds) between the direct sound and the start of the reverb. It's the most important parameter to avoid drowning out the main track. If you set the pre-delay to 0 ms, the reverb starts instantly, sticking to the vocal or snare and pushing it back in the mix. If you set the pre-delay between 20 and 40 ms, the ear will have time to hear the clean "slap" of the initial transient, and only a fraction of a second later will it hear the room. This keeps the sound in your face , but immersed in a large space.
Early Reflections: In OrilRiver, you have dedicated controls for the balance between the initial impact (ER) and the aftertaste (Reverb). Early reflections tell the listener's brain how large the room is and where the sound source is located.
Increasing the early reflections will give you a sense of "real room" and closeness, while lowering them will give a more ethereal and distant effect.
2. Time and Size: The Length of the Queue

In OrilRiver you find two fundamental controls that work together: Size and Time (the classic RT60).
What to watch out for: The decay time shouldn't be set based on "how much you like," but rather based on the BPM and groove of the song . If you have a fast, up-tempo track, a 3-second reverb will muddy everything, creating a carpet of muddy noise. A snare's reverb should ideally fade out before the next snare hits.
Make sure the breathing of the room is in time with the piece.
To help you avoid going crazy with the calculator and save you time, I've developed a very useful free online tool that allows you to calculate the exact reverb times based on the BPM of your song .
Enter the BPM and you'll instantly get the exact milliseconds for pre-delay and decay.
You can find it here: AudioDesk Reverb Decay Calculator .
The Size parameter instead enlarges the virtual geometry of the room: larger rooms tend to have different resonances and more spaced reflections.
3. Diffusion: Geometry and Density
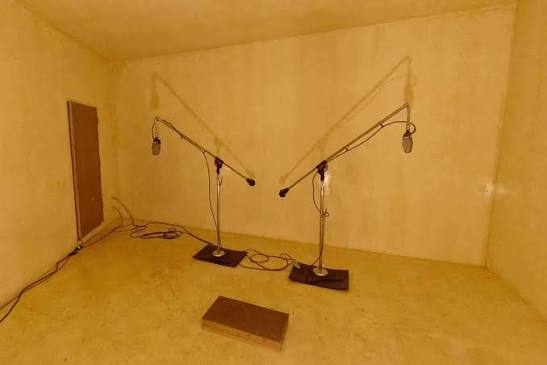
Here we enter the true character of reverb.
Imagine being in an empty parking lot with parallel concrete walls: if you scream, you will hear distinct, metallic echoes (pam... pam... pam).
Now imagine being in a cathedral full of statues, niches, and columns: the sound bounces in a million directions, creating a soft, uniform cloud (pshhhhh).
Diffusion: In OrilRiver, this parameter precisely controls the density of the obstacles in the virtual room. A low diffusion will keep the reflections separate. It's useful on acoustic guitars or percussion instruments if you want a "rough" sound or a slapback delay-like effect. A high diffusion spreads out the rebounds, making the aftermath thick, creamy, and smooth. This is the must-have setting for vocals, synth pads, or strings, where you don't want to hear the individual repeats "scratching" against the vocals.
4. Damping and EQ: Room Materials

Reverb isn't just about space, it's about materials. An empty room with tiled walls will sound sharp and bright. A room lined with carpet and velvet will absorb the high frequencies in a split second, producing a dark, warm aftertaste.
Damping and Reverb EQ: Damping adjusts the rate at which high (or low) frequencies decay relative to the rest of the sound. OrilRiver is great here because, in addition to the damping controls, it provides a very precise 3-band EQ for sculpting the wet signal (the total reverb). If you apply a high-end cut with the EQ, the reverb will darken, pushing the instrument deeper without compromising the sibilance and presence of the lead vocal.
Golden rule: use the built-in EQ to always cut the lows from the reverb!
Reverb below 150 Hz can create muddiness and destroy the definition of the kick and bass. Cut the lows to taste, but also to let the mix breathe.
The Ultimate Workflow with OrilRiver
Next time you open this plugin, use this method:
Set Skin 2 to have a clear view of the logic blocks.
Put it in Aux set to 100% Wet.
Temporarily lower the “Reverb” fader and listen only to the “Early Reflections” to sculpt the initial size of the room.
Turn up the tail (Reverb) and set the Time parameter in time with the song (using the Reverb Calculator I linked above).
Adjust the Pre-Delay to detach the reverb from the original transient.
Play with the EQ of the wet signal until the reverb sits comfortably behind the mix, without clouding the mids and highs of the instrument.

From a Great Mix to an Explosive Master
You've spent hours perfectly adjusting the Early Reflections and Damping parameters to create depth and three-dimensionality in your song. The problem? All that effort risks being wasted if the final stage of the process is crammed into a box with sloppy processing.
To preserve that stereo image, give it real depth, and glue the mix together without making it sound plastic, you need iron. At VDSS Studio, we offer Online Mastering and Online Stem Mastering services designed precisely for this.
With Stem Mastering, in particular, we add your groups of tracks together through our Neve 8816 analog summing mixer . This allows us to recover enormous headroom and widen the stereo panorama in a physical and natural way.
The summed signal is then captured by mastering-grade Burl B2 converters, using their transformers to give that final musical saturation and punch that no plugin will ever be able to emulate 100%.
If you want to take your music to the next level, show me what you're working on.


Comments